
HOW TO: Customize Your Invoice

You know how you want yourself and your business to be identified. Having consistent branding is important to any company or freelancer.
Part of this branding, is how you bill your clients.
When you're invoicing, you need to be able to be easily identified by your client. This can be done by creating invoices which coincide with your brand colors, logo, and tone of voice.
Invoice Home provides you with an easy-to-use billing generator, which allows you to create invoices with just a few clicks. Need help creating your first invoice? Click here.
Invoicing with Invoice Home is easy, here’s how to take a few extra steps to give your invoices an added personal touch.
How to Customize Your Invoice
Choosing a Template
You may have chosen Invoice Home because of our fair pricing, quick invoicing generator, or perhaps the 100 templates we offer. With so many templates to choose from, you can match your billing documents to your brand perfectly!
By clicking on any document, then going to “Select Template,” you can choose any of our professionally designed templates.
Trying to keep a professional branding? Use our Neat or Simple templates. Want to show off your creative side? Use our Watercolor or Sunset templates. You can also customize your template to go with any season. Try our Snow or Fall Leaves templates, perfect for fall and winter invoicing.

Adding a Logo
Needless to say, your logo is an important part of who your company is or who you are as a freelancer. Even if you are not a business owner, adding a logo is beneficial as it helps to identify you; the sender of the invoice.
Invoice Home offers two options for adding a logo. You can use one of our 500 free business logos or upload your own. Our logos range from the clipart style such as our guitar or paw-print logo, to people logos like a detective, designer, or blogger, and to job logos like an architect’s pencil or florist’s bouquet.
To change the logo, just open your document, go to “Edit” then click “Select Logo.”
To upload your own logo, open your document, go to “Edit” then click “Select Logo,” then click “Your Logo.” Next, click “Choose File.” Your logo should be a GIF, JPG or PNG image, and a maximum of 5 MB in size.
If you are experiencing any difficulty uploading your logo, there are two things you can do to make this process run more smoothly. Primarily, you can save your logo as a PNG file with a transparent background. Secondly, you can try uploading your logo from another browser like Chrome or Firefox.
Once you upload your logo, it will appear under the “Your Logo” tab for future use.
Writing Your Terms and Conditions
When you create your Invoice Home account, the terms and conditions are automatically filled in as “Payment is due within 15 days.” However, this is fully customizable. If you have issues getting a client to pay you you may want to change the terms and conditions for future use. You can change when the payment is due or write that the payment will accrue an interest rate of % each week there is an outstanding balance.
You can also add your preferred payment options in the Terms and Conditions.
How and when you want your clients to pay is up to you, and so are the Terms and Conditions. To edit the Terms and Conditions, just click on the “Edit” tab of any document, then scroll down to the bottom of the page and click in the text box under “Terms and Conditions.”
Each time you change your Terms and Conditions on a billing document, Invoice Home will automatically have this autofill on each document you create going forward for quick and easy billing. To change this, just create a new invoice with an updated Terms and Conditions.

Adding Your Signature
You’ve made the perfect invoice and personalized it to your liking. Sign off on your invoice by inserting your own signature!
Either upload a photo of your signature on a white background, or draw your own using your mobile device. To upload your own signature, click "Choose file" and upload your picture as a JPG or PNG file.
Do you want to write your own signature?
Here's how:
Just open the Invoice Home app, then:
Tap on an invoice
Tap "Select Signature"
Tap “New”
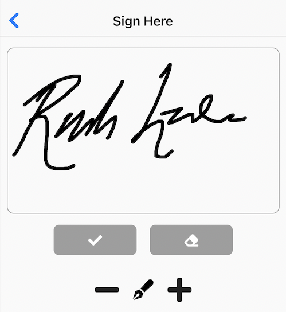
Tap "Draw Now" and sign your name
Tap the check mark when done or the eraser to
start over. Then tap on the - and + to change
how thick your signature appears.
Your signature will now be added to the invoice for an added personal touch!
Now, that you've customized everything to your liking, it's time to start invoicing.

Thank you for using Invoice Home!