HOW TO: Recurring Invoices - pt. 1 - Steps to Set-up

© nenetus /Adobe Stock
Do you bill your customers for the same products or services every week, month, quarter, or year? If the answer is “yes”, then recurring invoices are for you!
If you’re a landlord, landscaper, language tutor, or work in another profession offering the same services regularly, you probably have customers who you invoice consistently for the same amount.
Creating and emailing the same invoice over and over can get old. So, let us automate the process for you. Set up recurring invoices today!
What is a Recurring Invoice
A recurring invoice is an invoice that is sent to your customers for the same amount and on the same date each week, month, quarter, or year.
Recurring Invoices - What About Other Recurring Documents?
Don’t worry! Any of the documents offered on Invoice Home can be set up with the recurring function.
Using the Recurring Invoices Feature on Invoice Home
By popular request, we’ve launched recurring invoices so you can now quickly and easily set up automatic billing for your customers. Just follow the below steps!
Click Here for Mobile Instructions
How to Set Up a Recurring Invoice with Invoice Home
DESKTOP
1. Sign in to Invoice Home here.
2. Create a new invoice and save it, or click on an existing one from your list of documents.

3. Click on the “Recurring” tab.

4. Click on the circle next to the frequency option you would like to set the recurring invoice for.

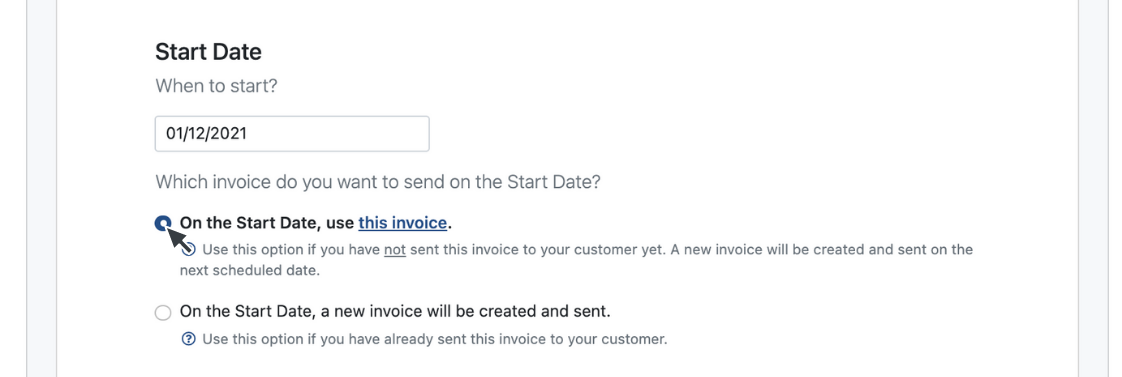
5. Enter a Start Date. Then, choose which invoice you want to send on the start date.
Note: Select the “On the Start Date, use this invoice.” option if you have never sent the invoice to your customer.
Select the “On the Start Date, a new invoice will be created and sent.” option if you have previously sent the invoice to a customer and want a new one to be sent on the start date.
6. Choose a Stop Date.

7. Set up your “Email Template”. Enter your customer’s email address, the text you want to appear in the Subject, and the text you want to appear in the body of the email.
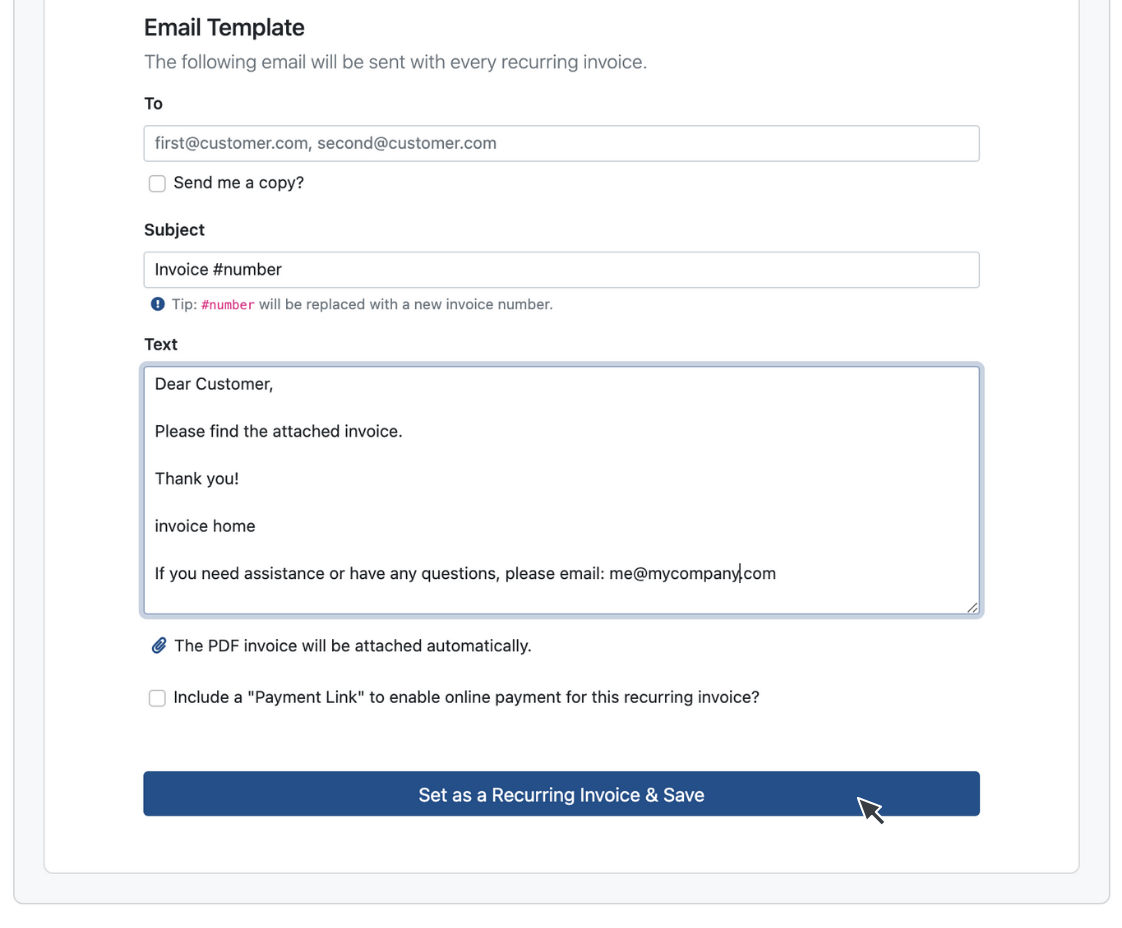
8. Click the “Set as a Recurring Invoice & Save” button.
Congratulations! Now your recurring invoice is set up!
APP - Android and iOS
1. Open the Invoice Home app.
2. Tap on an invoice or create a new one.
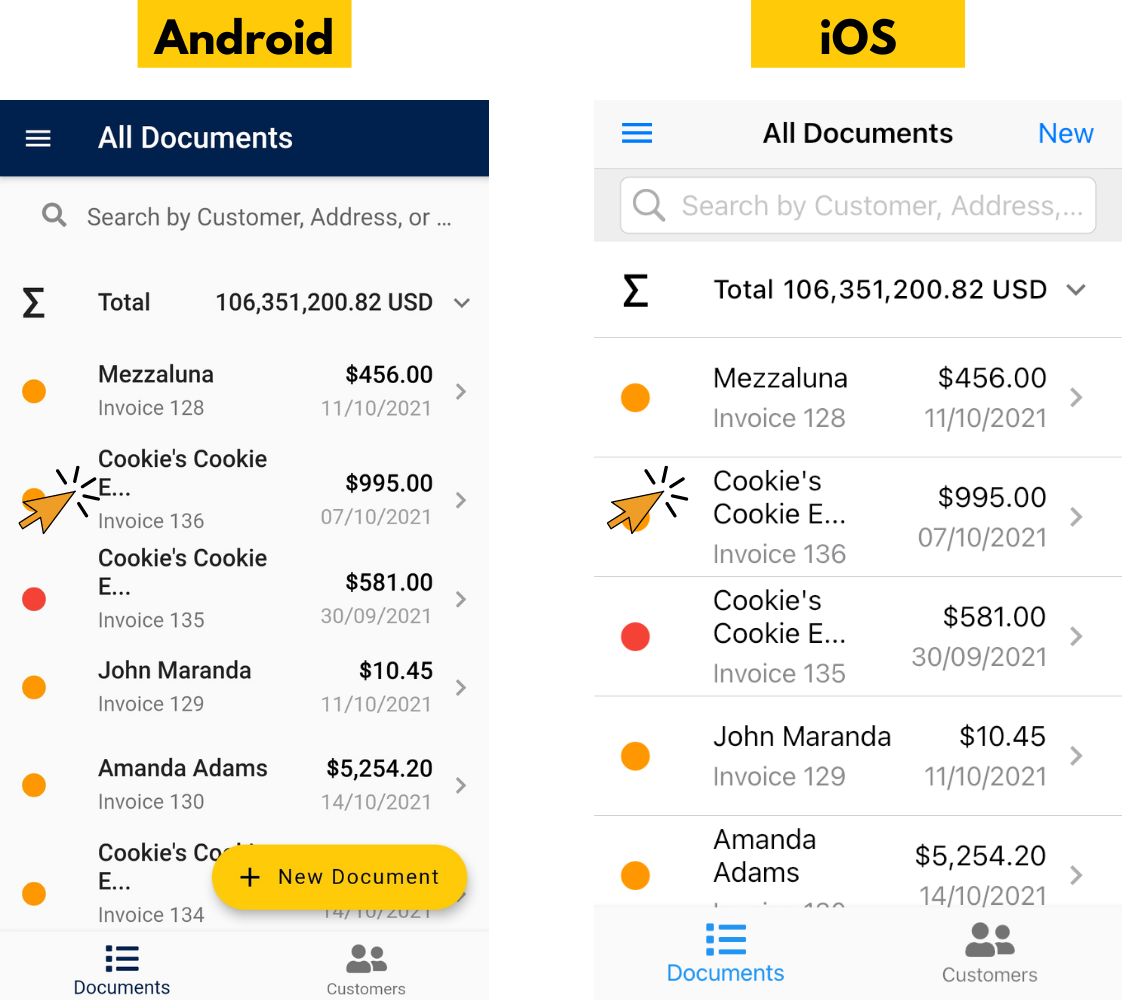
3. Tap “Recurring”.
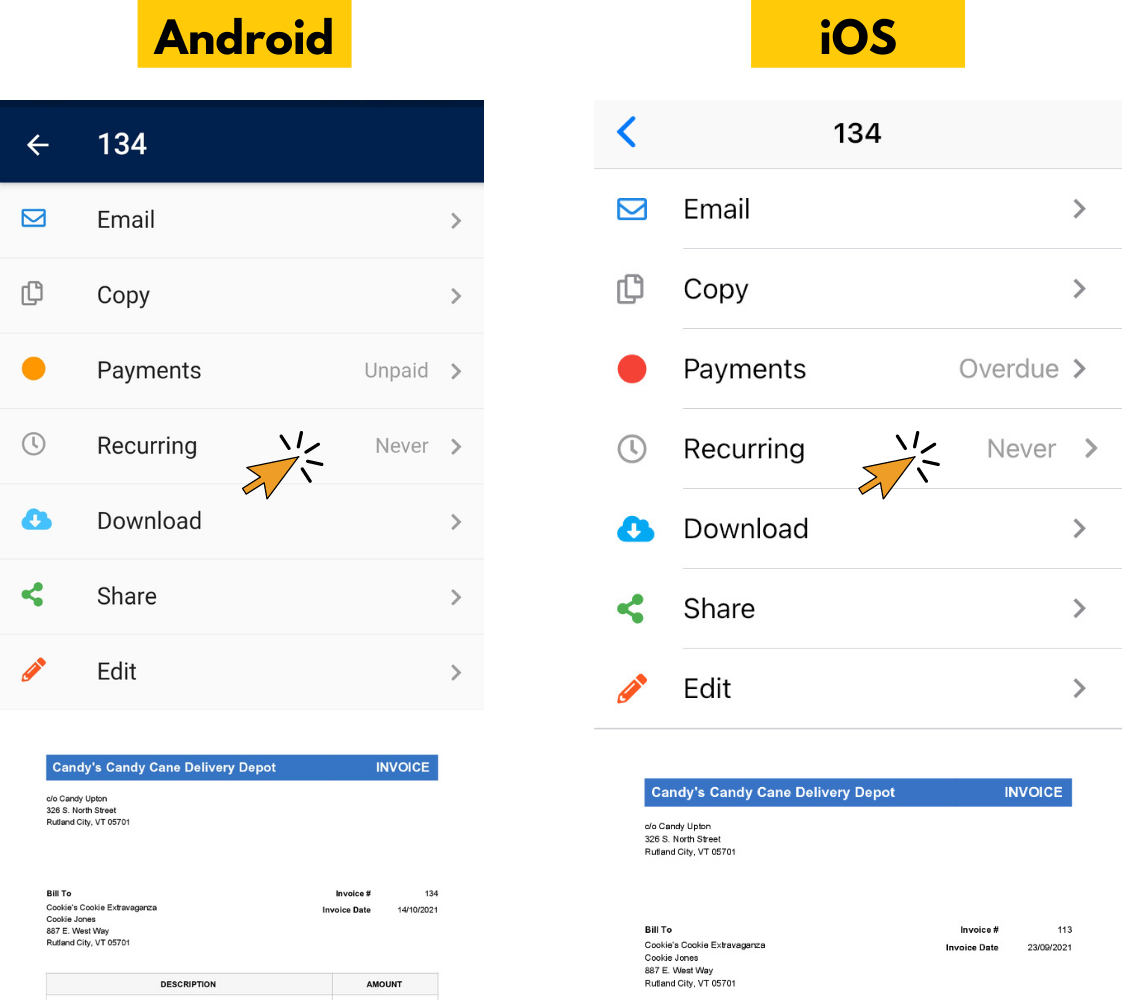
4. Tap “How often should this Invoice repeat”?
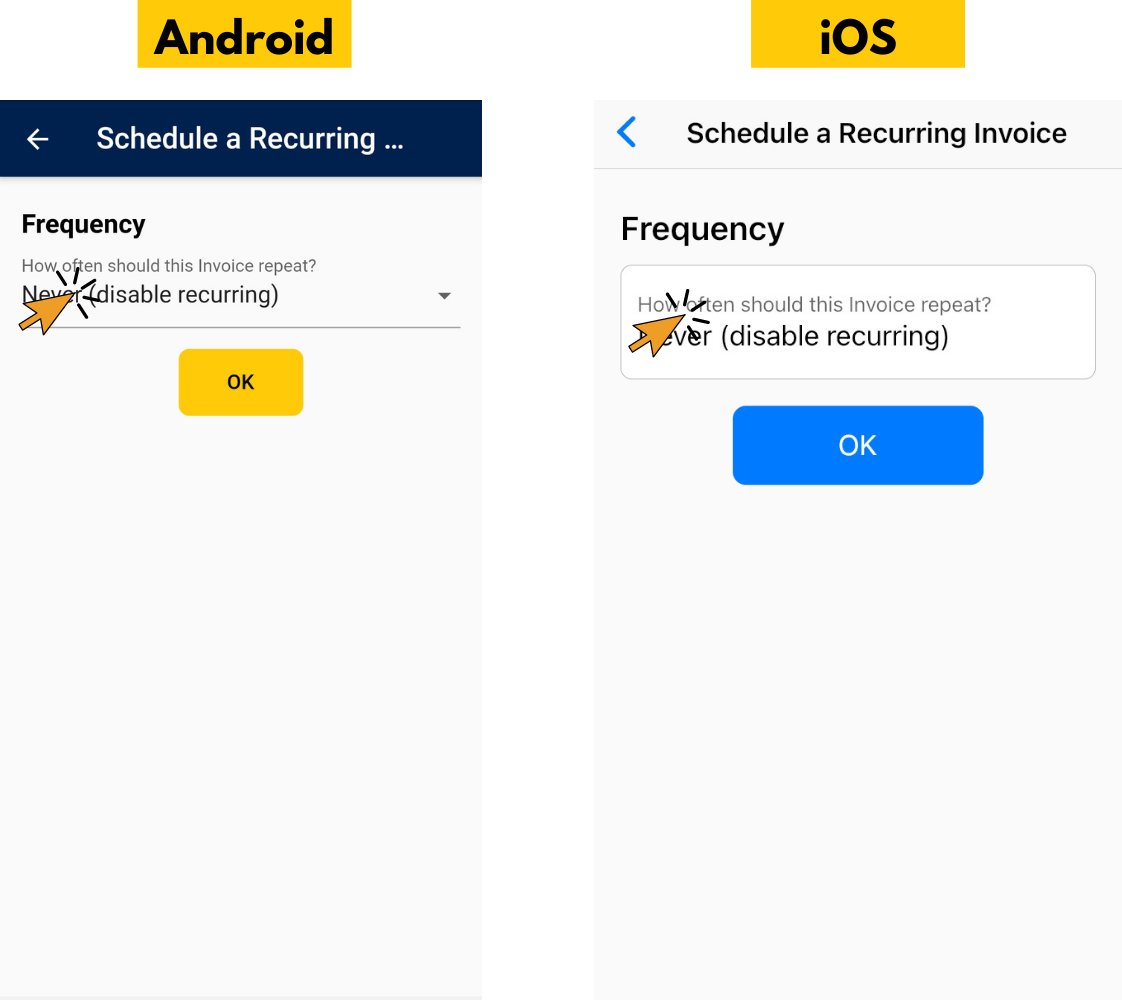
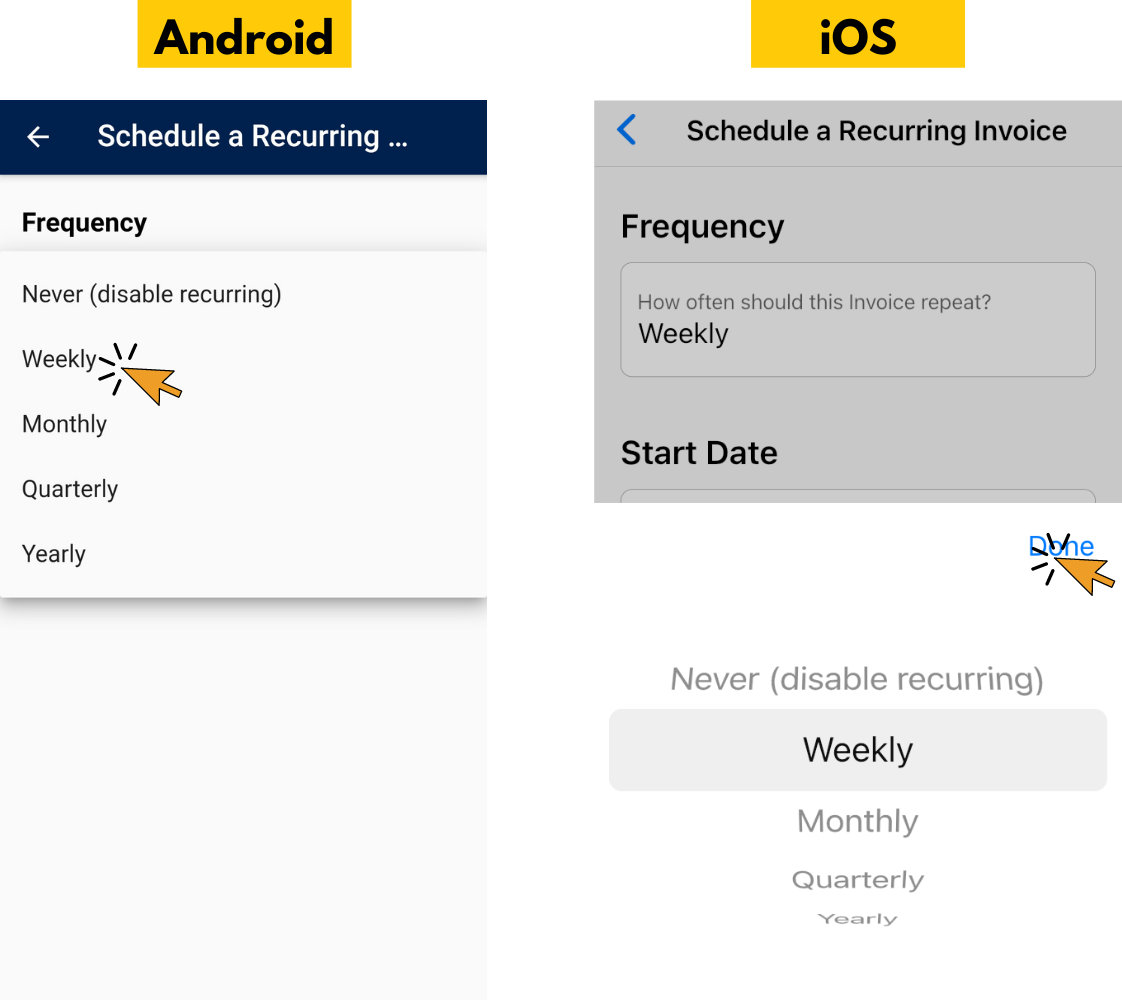
5. Choose a frequency. Tap “Done” on iOS.
6. Tap “When to start?” and choose a start date. Tap “OK” on Android or “Done” on iOS.
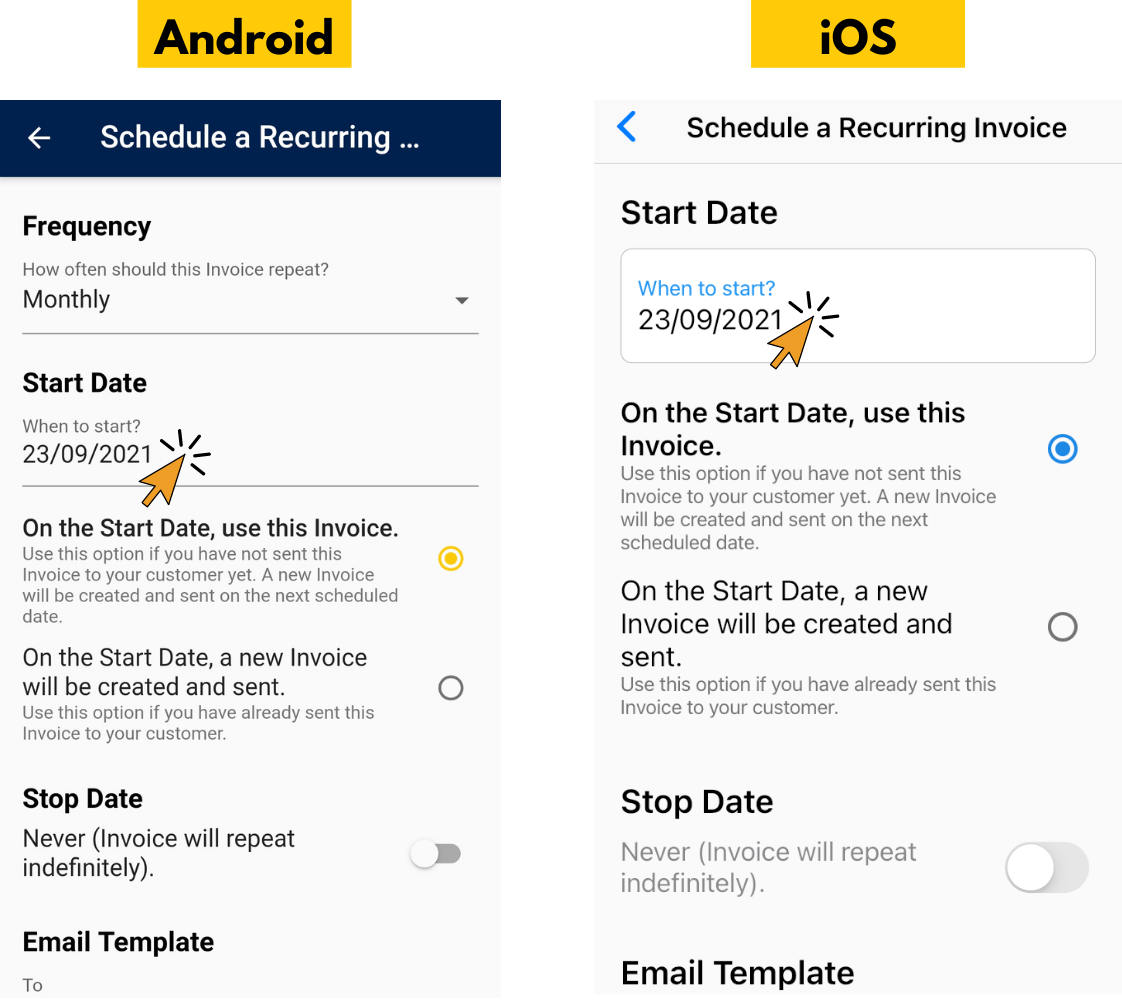
7. Choose which invoice you want to send on the start date.
Note: Select the “On the Start Date, use this invoice.” option if you have never sent the invoice to your customer.
Select the “On the Start Date, a new invoice will be created and sent.” option if you have previously sent the invoice to a customer and want a new one to be sent on the start date.
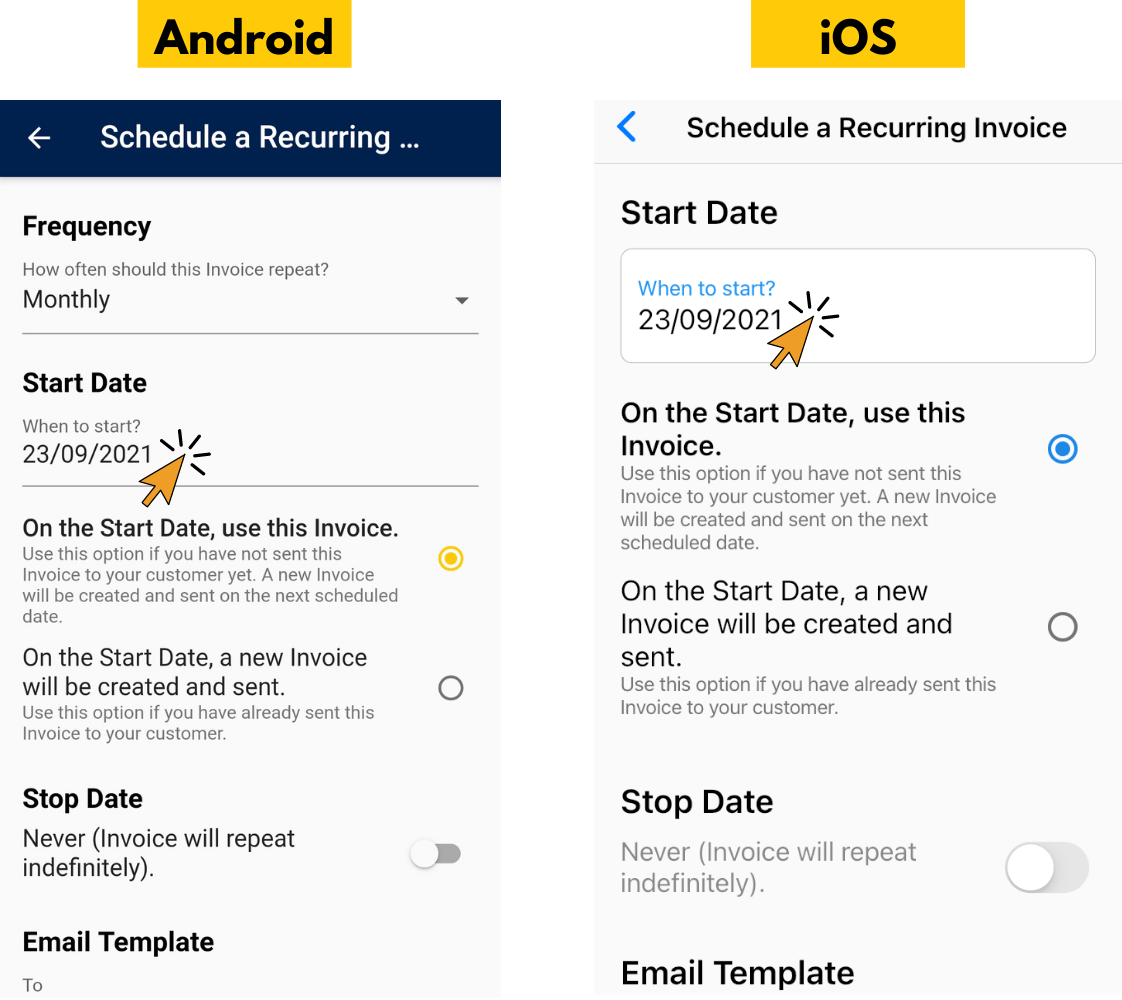
8. Choose a Stop Date, if relevant, by tapping the toggle button.
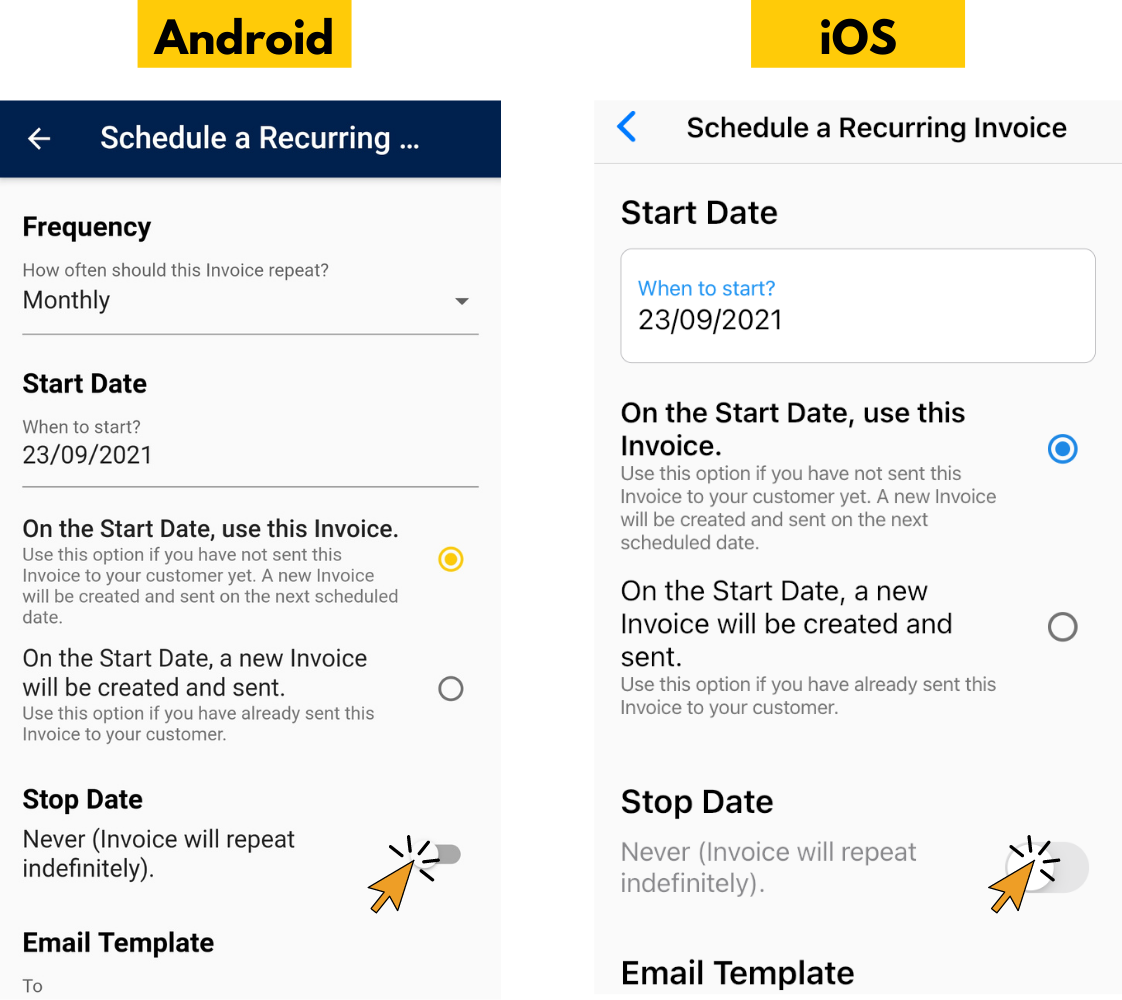
9. Tap, “When to stop?”
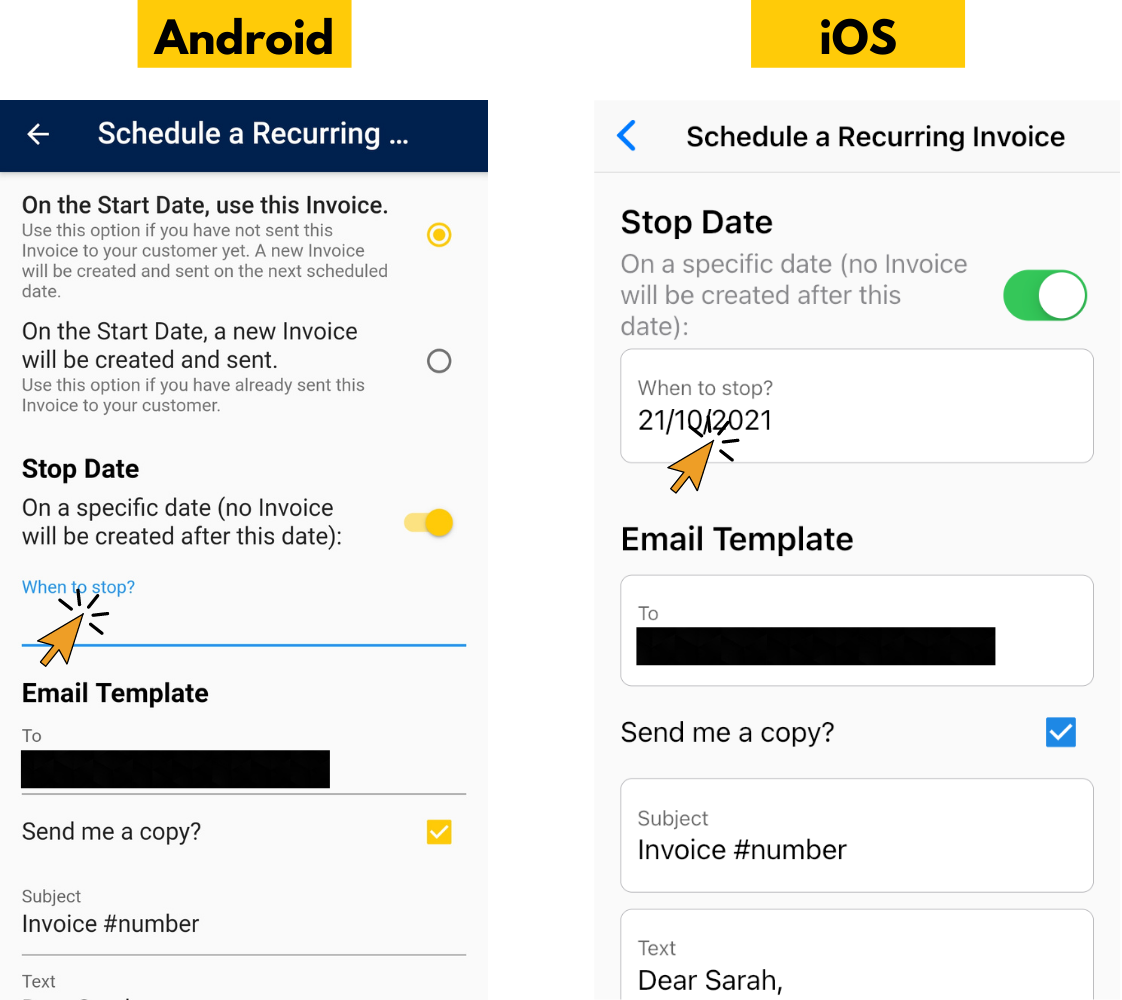
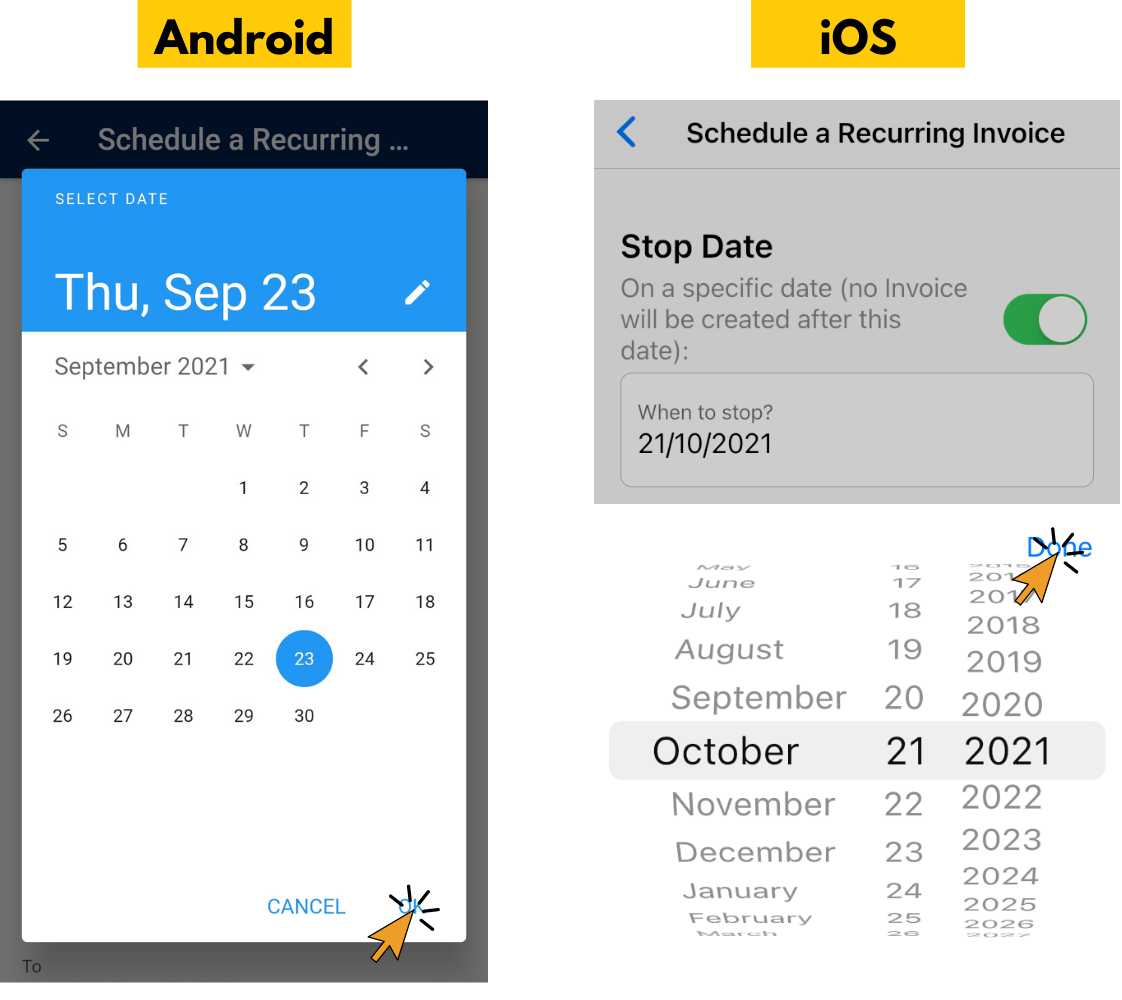
10. Choose the date, then tap “OK” on Android or "Done" on iOS.
11. Set up your “Email Template”. Enter your customer’s email address, the text you want to appear in the Subject, and the text you want to appear in the body of the email. Click the "OK" button.
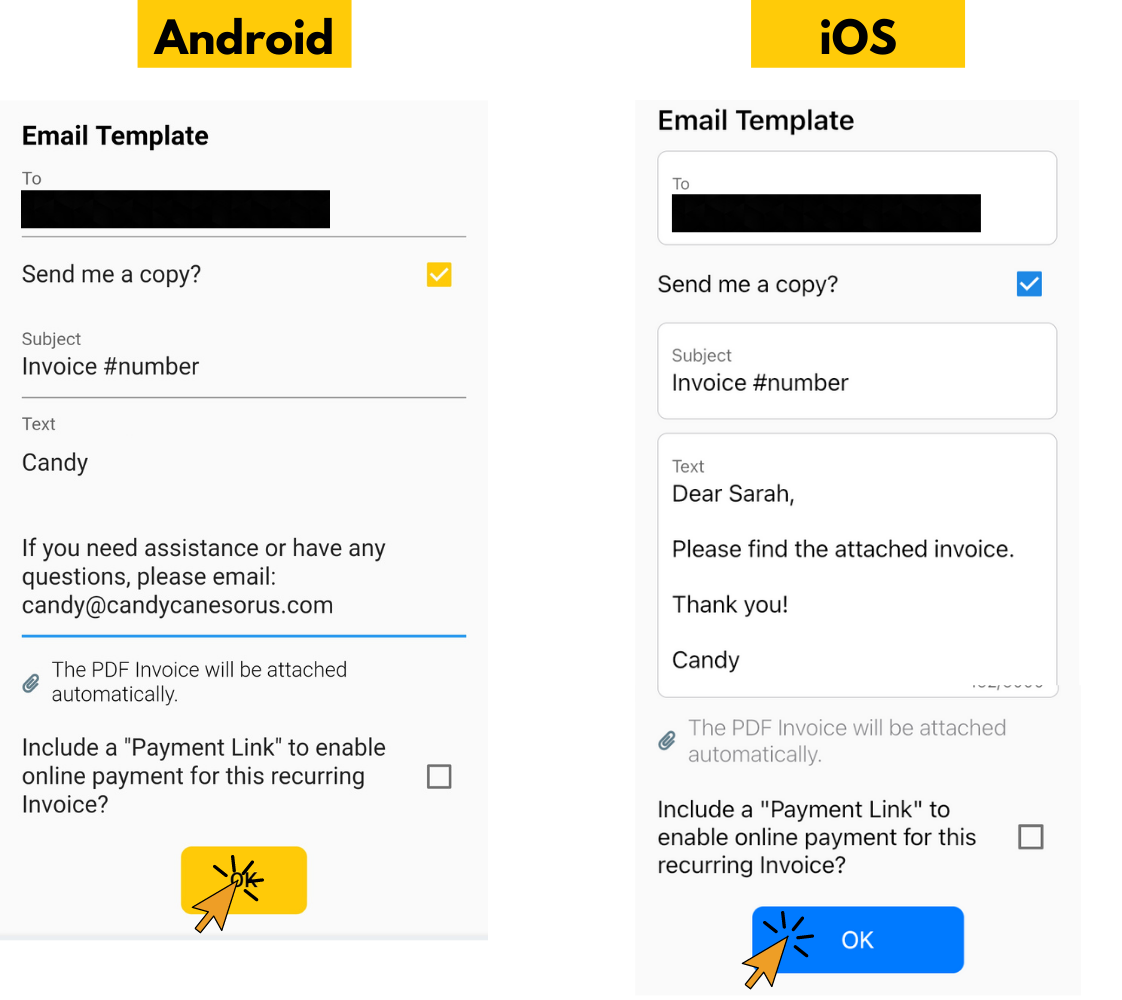
Congratulations! Now your recurring invoice is set up!
More Info on Recurring Invoices
- Click Here for Instructions on How To See Sent Invoices
- Click Here for Instructions on Edit Recurring Invoices
- Click Here for Instructions on How Stop Recurring Invoices
Find out more about Invoice Home’s features and functions!
Thank you for using Invoice Home!

